How to change email storage folder in Windows Live Mail
Lawrence Abrams
- January 14, 2013
- Read 451,844 times
If your C: drive starts to run out of space, one of the most frustrating experiences can be figuring out what can be deleted or moved to another drive in order to free up storage. This is especially true with modern computers that are commonly configured with small SSD drives as their C: drive, which can easily run out of space due to their smaller storage capacity. If you are using Windows Live Mail it will store your email by default on your C: drive. If you are like me and save almost all of your email, then your Live Mail mail store can grow to a very large size. Thankfully, the program provides the ability to easily change the location where your mail is stored so that you can you move it to another drive that may have more free space available. This tutorial will walk you through changing where your Windows Live Mail e-mail is stored.
The first step in moving your mail store is to start Windows Live Mail. Once the program has started click on the on the program's menu, which is found in the upper left hand corner of the program as shown below.
Once the menu is open click on the Options section and then click on the Mail menu option. This will open the General tab of the Mail options screen. Please click on the Advanced tab and you will be shown a screen similar to the one below.
Now click on the Maintenance option as indicated by the red arrow in the image above. This will bring you to the Maintenance settings screen.
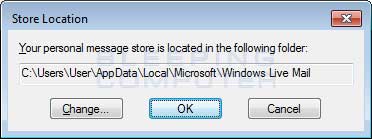
Now click on the Store Folder option. This will open a small dialog box that shows the path to the current mail store folder.

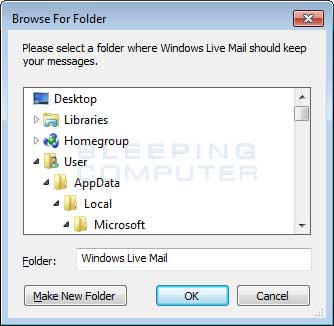
On the above screen we can change the location that Windows Live Mail stores its email. To do this, click on the Change button and you will now be presented with a Browse dialog box where you can select the new location for the mail store.

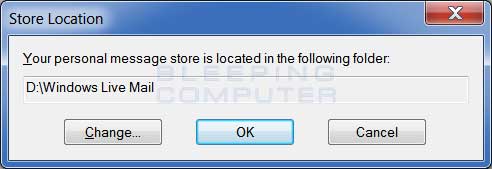
Browse to an existing location that you wish to move your mail to or create a new folder. Once you are done, click on the OK button. You will now be shown the Store Location dialog box with the new path that you selected.

To have Windows Live Mail use this new folder, click on the OK button. Once you click on the OK button, you will be shown a prompt that states you need to restart Windows Live Mail for these changes to go into effect. Click on the OK button in this prompt and then close Windows Live Mail.
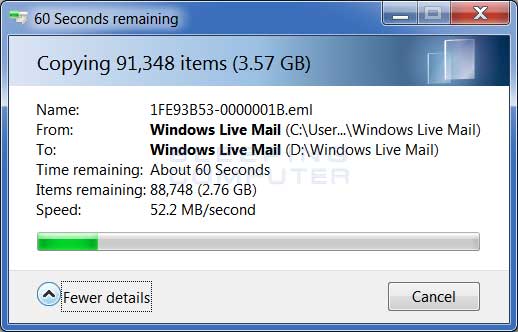
Once you close Windows Live Mail, the program will automatically copy all your existing mail and mail folders to the new location.

Once it is done, you can start Windows Live Mail again and the program will now be storing your mail in the new location.
Unfortunately, even though Windows Live Mail states it is moving your mail it is actually just copying it. You will still need to delete your old Windows Live Mail folder in order to free up the space on your C: drive. To do this close Windows Live Mail and browse to the old Windows Live Mail folder which is located under the following folder:
Windows 8, Windows7, Windows Vista: C:\Users\<login name>
AppData\Local\Microsoft\ Windows XP: C:\Documents and Settings\<login name>\
Application Data\Microsoft\
When you open that folder you will see a subfolder named Windows Live Mail. This is your old mail store. First rename it to Windows Live Mail.old and start Windows Live Mail again. If you can still access your email then we know that the program is using the new folder and we can safely delete the old one. Close Windows Live Mail again and now delete the Windows Live Mail.old folder. When the folder has finished deleting, you can now empty your Recycle Bin.
Windows Live Mail is now using the new folder and you have freed up the space it was using on your C: drive.
If you have any questions performing these steps, please ask in the Web Browsing/Email and Other Internet Applications forum.


